You all showed me so much love for the Cable Knit Ear Warmer pattern, I had to come through for the crocheters! I tried to make this pattern as versatile and simple as that one. If you don’t know how to crochet cables, this is a great first cabling project! Don’t hesitate to experiment with different yarn weights and hook sizes.
If you’re using a medium to heavy worsted, grab a size I (5.5mm) crochet hook and chain 13 + 3.
Row 1: skip the last 3 chains and make 1dc in the 4th chain from your hook and in every chain in your foundation chain (14 double crochets total counting your skipped chain 3)
Row2: Chain 2 ( counts as a half double crochet) and turn your work. Make 1 hdc in the back loops of each of the next 4 stitches. Then, make a total of 4 back post double crochet’s around the tops of the next 4 double crochets from the previous row. Make 1 hdc back loop in each of the last 5 stitches in the row (including the top of your ch3 from the previous row). You should end with 4 back post double crochet’s in the middle with 5 half double crochet’s on either side.
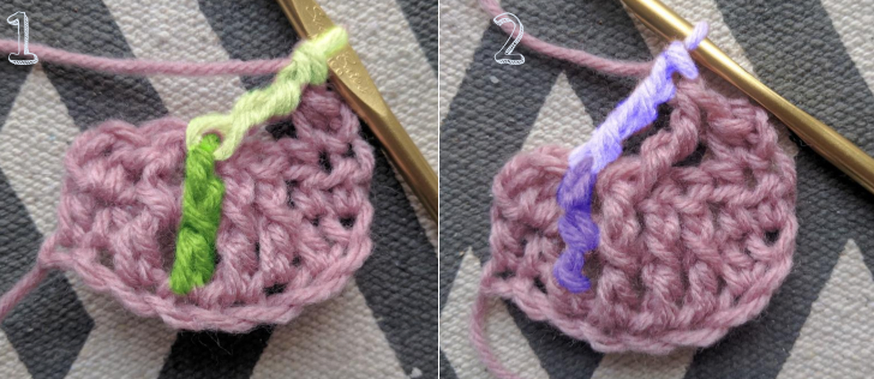
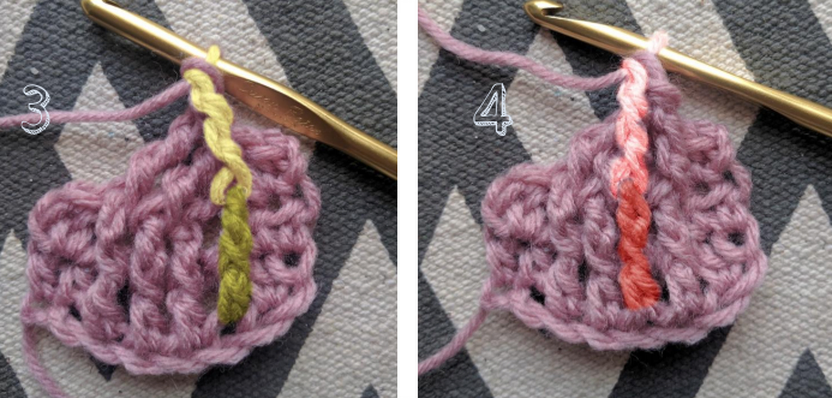
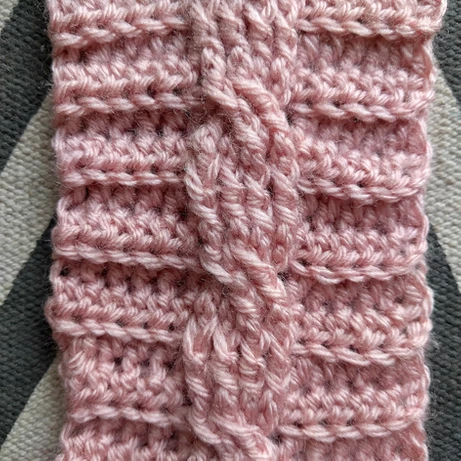
Row 3: **Cable Row!** Chain 2 and turn your work. Make 1 hdc (back loop) in each of the next 4 stitches. To make the cable, skip your first 2 post stitches from the previous row and make a front post double crochet around the 3rd post. Then fpdc around the 4th post. Working backwards, make 1fpdc around the first post in the row, and lastly, make 1fpdc around the 2nd post. See the images below that illustrate the order that you make your front post double crochets to achieve the cable stitch. Finish up this row with 1hdc bl in each stitch in stitch to the end of the row.
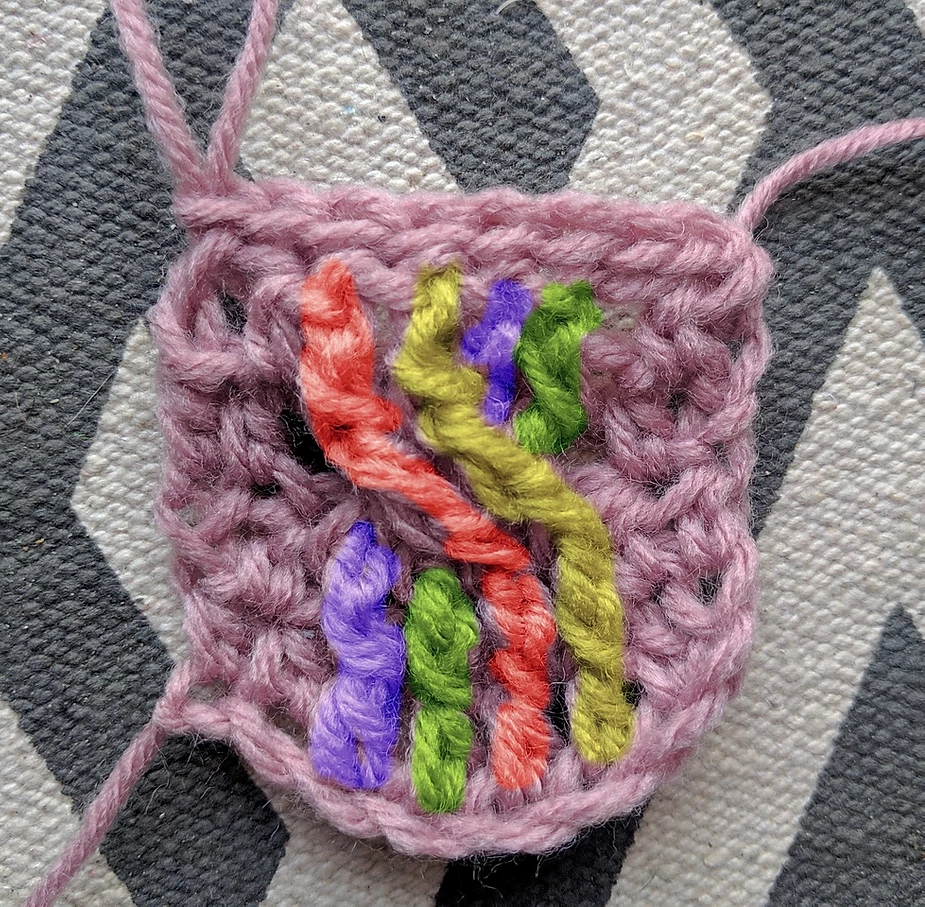
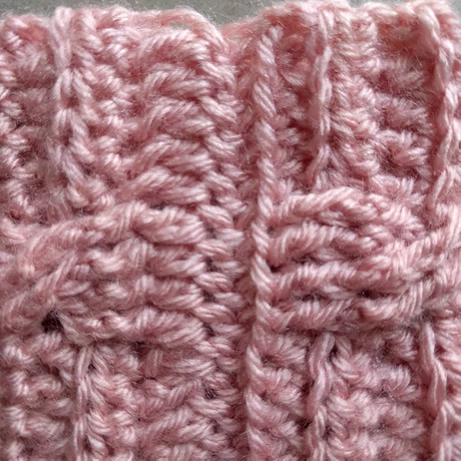
Row 4: chain 2, turn, again make 4 hdc bl across the next 4 stitches. Make 1 back post double crochet around each of the next 4 post stitches. Be careful not to miss the 3rd post stitch that’s criss-crossed behind two posts, it can be a bit tight. End with 1hdc bl in each of the last 5 stitches in the row. The way the stitches line up after this row is pictured below:
Row 5: Ch2, turn. Make 4 hdc bl across the next 4 stitches. 4 Fpdc followed by 5hdc bl.
Row 6: Ch2, turn. Make 4hdc bl followed by 4 bpdc followed by 5hdc.
Repeat rows 3-6 until your piece measures 17 to 18 inches. Finish on a row 5 row.
This will be a different number of rows depending on the yarn/hook/tension you are using but for my heavy worsted sample this was 46 rows.
Seaming!
To perfectly seam the foundation row and last row together, with your work inside out, line up your stitches and slip stitch under the foundation chain stitches and under the back loops of the last row together.
Turn your ear warmer right side in, fasten off and weave in your ends!
Alterations!
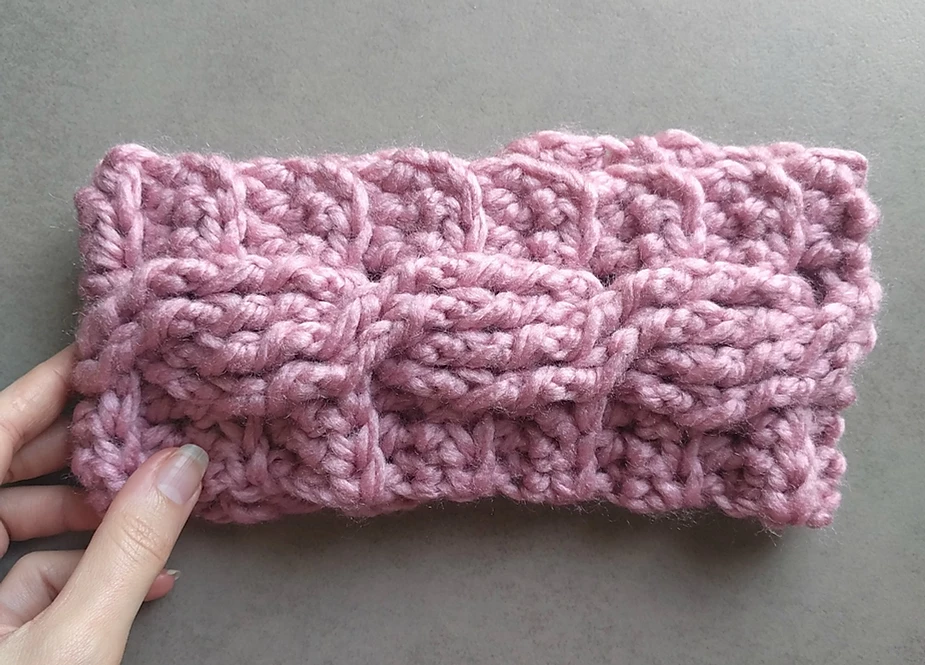
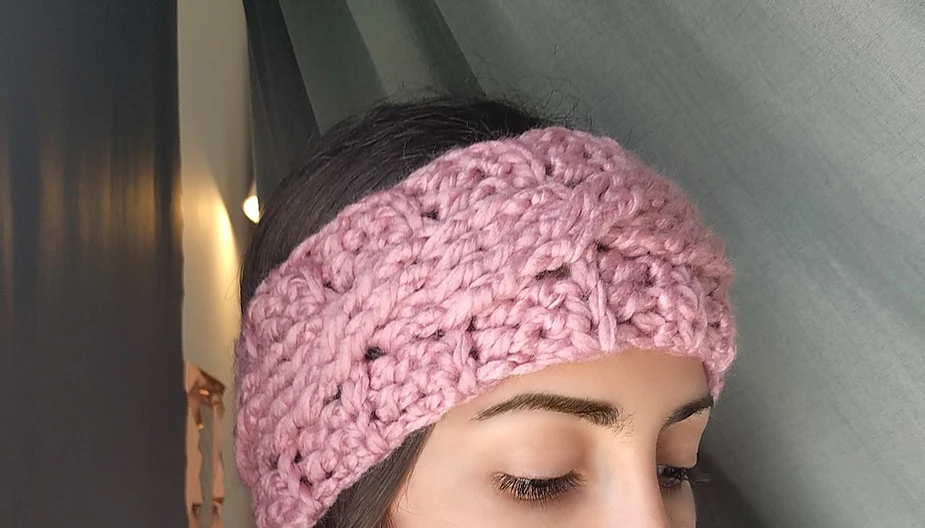
I like to change up this pattern by experimenting with different numbers of half double crochet stitches on either side of the cable. Here you can see a super chunky version with 3 hdc’s on either side.
Below, I have a sample done in a light worsted weight yarn like caron simply soft with 6 hdc’s on either side.
Simply add or subtract 2 chains to that initial “chain 13+3” for every 2 hdc’s you change in the pattern. So the chunky version started with 9+3 chains and the light worsted started with 15+3.
Of course, this will change the number of rows you need to make the headband fit around your head so try it on for size before you seam it all together!
I hope you enjoyed this pattern! I’d love to see your projects on Instagram or Ravelry. And if you loved working this cable, I use a similar cable detail in my Cable Crochet Bun Beanie pattern available in my premium pattern shop on Etsy if you’d like to give something a little more advanced a try!